Bulk Programming
Objective
This functionality will provide you an easier and much faster process to push one common data into multiple panels at a time. You also have the flexibility to schedule the communication job on selected accounts at any time.
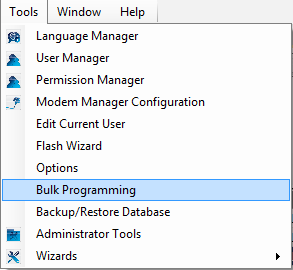
This tool can be accessed from Tools-->Bulk Programming
Bulk Programming tool consist of five sections:
- Start
- Account Search
- Action
- Communications
- Summary
- Progress
Start
When Bulk Programming will be launched from Tool menu, you will start at the welcome page which briefly provides the objective of the tool.
Account Search
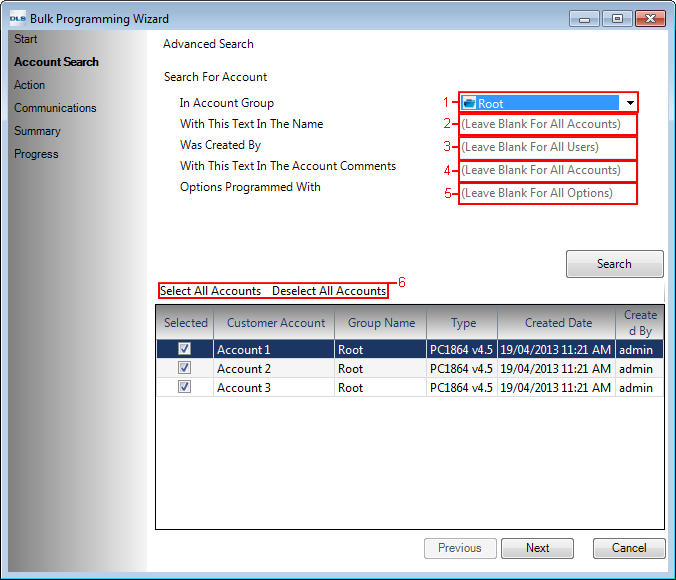
After clicking ˜Next" on ˜Start" page, you will be navigated to ˜Account Search" page where you will see all your existing accounts in DLS 5 listed. You will have the ability to filter the accounts list based on the following criteria:
1. In Account Group Filter out the accounts based on the group they are located
2. With This Text In The Name Filter by the text within the account name
3. Was Created By Filter by the operator name who created the account(s)
4. With This Text In The Account Comments—Filter account with these comments within it
5. Options Programmed With Filter out the accounts in which this non-default data is present
6. ˜Select All Accounts" & ˜Deselect All Accounts" If only certain account(s) need modification with the list, click ˜Deselect All Accounts" and select only the desired accounts
Action
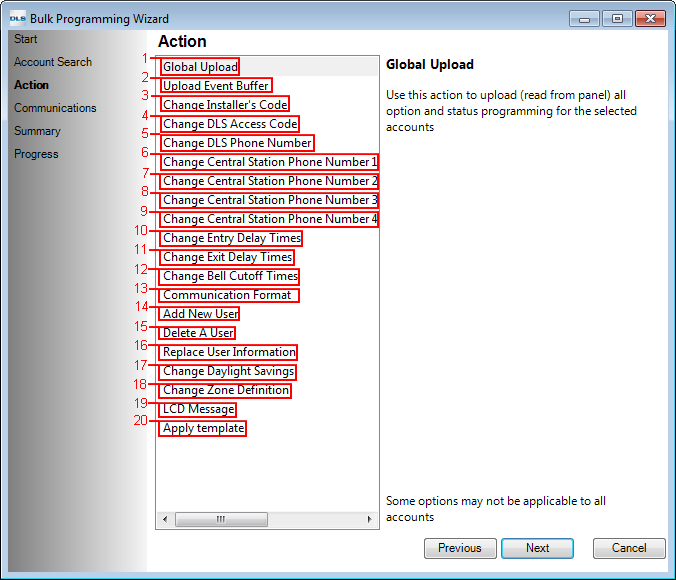
Once you have selected your desired accounts, click ˜Next" and you will be in ˜Action" page where you can execute the following actions:
1) Global Upload Perform global upload on selected panels
2) Upload Event Buffer Upload event buffer for selected panels
3) Change Installer's Code
- Always ”Change any existing default or non-default installer code to this new code
- If the Installer's Code is programmed as Insert existing code which will now be changed with new code inserted
E.g. If existing installer code is ˜6034" and we want it to be ˜5123" then it will be changed to new code.
- If Installer's Code has this data in it If an installer code contains this number(s) then replace it with these new number(s)
E.g. If installer code is ˜6034"™ and if select ˜34"™ to be ˜21" then new code will become ˜6021".
- If Installer's Code starts with If an installer code start with these number(s), replace them with the new code
E.g. If installer code is ˜6034" which starts with ˜60" and we say to change it to ˜45" then new installer code will become ˜4534".
Please note: If the new inserted code does not match the exact code length which is required in the account, then at the end of bulk programming user will be notified of the error. A similar error will also prompt when changing the data within the code and replacing the characters within the code string lengths doesn't match up.
4) Change DLS Access Code
- Always Change any existing default or non-default DLS Access Code to this new code
- If the DLS Access Code is programmed as Insert existing DLS Access Code which will now be changed with new DLS Access Code inserted
E.g. If existing DLS Access Code is ˜186412" and we want it to be ˜186487" then it will be changed to new code.
- If DLS Access Code has this data in it If an DLS Access Code contains this hex digit(s) then replace it with these new hex digits(s)
E.g. If DLS Access Code is ˜186434" and if you select ˜34" to be ˜21" then new code will become ˜186421".
- If DLS Access Code starts with If an DLS Access Code starts with these hex digits(s), replace them with the new hex digit(s)
E.g. If DLS Access Code is ˜186412" which starts with ˜18" and we say to change it to ˜45" then new installer code will become ˜456412".
Please note: If the new inserted DLS Access code does not match the exact DLS Access Code length which is required in the account, then at the end of bulk programming user will be notified of the error. A similar error will also prompt when changing the data within the code and replacing the characters within the code string lengths doesn’t match up.
5) Change DLS Phone Number
- Always Change any existing default or non-default DLS Phone Number to this new DLS Phone Number
- If the DLS Phone Number is programmed asInsert existing DLS Phone Number which will now be changed with new DLS Phone Number inserted
E.g. If existing DLS Phone Number is ˜1234567890" and we want it to be ˜9057603000" then it will be changed to new code.
- If DLS Phone Number has this data in it If an DLS Phone Number contains this characters(s) then replace it with these new characters(s)
E.g. If DLS Phone Number is ˜9057603034" and if select ˜34" to be ˜21" then new DLS Phone Number will become ˜9057603021".
- If DLS Phone Number starts with If an DLS Phone Number start with these character(s), replace them with the new characters
E.g. If DLS Phone Number is ˜9057603021" which starts with ˜905" and we say to change it to ˜289" then new DLS Phone Number will become ˜2897603021".
Please note: If the new inserted DLS Phone Number does not match the exact Phone Number length which is required in the account, then at the end of bulk programming user will be notified of the error. A similar error will also prompt when changing the data within the DLS Phone Number and replacing the characters within the DLS Phone Number string lengths doesn’t match up.
6) Change Central Station Phone Number 1
- Always Change any existing default or non-default Central Station Phone Number 1 to this new Central Station Phone Number 1
- If the Central Station Phone Number 1 is programmed as Insert existing Central Station Phone Number 1 which will now be changed with new Central Station Phone Number 1 inserted
E.g. If existing Central Station Phone Number 1 is ˜1234567890" and we want it to be ˜9057603000" then it will be changed to new code.
- If Central Station Phone Number 1 has this data in it If an Central Station Phone Number 1 contains this character(s) then replace it with these new character(s)
E.g. If Central Station Phone Number 1 is ˜9057603034" and if select ˜34" to be ˜21" then new Central Station Phone Number 1 will become ˜9057603021".
- If Central Station Phone Number 1 starts with If an Central Station Phone Number 1 start with these character(s), replace them with the new character(s)
E.g. If Central Station Phone Number 1 is ˜9057603021" which starts with ˜905" and we say to change it to ˜289" then new Central Station Phone Number 1 will become ˜2897603021".
Please note: If the new inserted Central Station Phone Number 1 does not match the exact Central Station Phone Number 1 length which is required in the account, then at the end of bulk programming user will be notified of the error. A similar error will also prompt when changing the data within the Central Station Phone Number 1 and replacing the characters within the Central Station Phone Number 1 string lengths doesn’t match up.
7) Change Central Station Phone Number 2 Please refer to step (6)
8) Change Central Station Phone Number 3 Please refer to step (6)
9) Change Central Station Phone Number 4 Please refer to step (6)
10) Change Entry Delay Times—Both Entry Delay 1 and Entry Delay 2 values will be changed for all active partitions
- Always Change The defaulted/previous entry delay times in selected account(s) will be changed to new entry delay time
- If Entry Delay Times is programmed as Change the current entry delay time in selected account(s) to new delay time.
E.g. If any account(s) contain ˜005", change it to ˜010". Any account(s) not containing ˜005" or ˜010" will not be affected
- If Entry Delay Times is more than if any selected account(s) entry delay time is more than certain number then change it to new time
E.g. If any account(s) contain ˜005"+ time, they will be changed with new time
- If Entry Delay Time is less than if any selected account(s) entry delay time is less than certain number then change it to new time
E.g. If any account(s) contain ˜010"- time, they will be changed with new time
- If Entry Delay Times is between if an entry time is between this min and max value, then switch it with new time
11) Change Exit Delay Times Exit Delay value will be changed for all active partitions
- Always Change The defaulted/previous exit delay times in selected account(s) will be changed to new exit delay time
- If Exit Delay Times is programmed as Change the current exit delay time in selected account(s) to new exit delay time.
E.g. if any account(s) contain ˜005", change it to ˜010". Any account(s) not containing ˜005" or ˜010" will not be affected
- If Exit Delay Times is more than If any selected account(s) exit delay time is more than certain number then change it to new time.
E.g. if any account(s) contain ˜005"+ time, they will be changed with new time
- If Exit Delay Time is less than If any selected account(s) exit delay time is less than certain number then change it to new time.
E.g. if any account(s) contain ˜010"- time, they will be changed with new time
- If Exit Delay Times is between If an exit time is between this min and max value, then switch it with new time.
12) Change Bell Cutoff Times
- Always Change The defaulted/previous bell Cutoff times in selected account(s) will be changed to new bell cutoff time
- If Bell Cutoff Times is programmed as Change the current bell Cutoff time in selected account(s) to new bell cutoff time.
E.g. if any account(s) contain ˜005", change it to ˜010". Any account(s) not containing ˜005" or ˜010" will not be affected
- If Bell Cutoff Times is more than If any selected account(s) bell Cutoff time is more than certain number then change it to new time.
E.g. if any account(s) contain ˜005"+ time, they will be changed with new time
- If Bell Cutoff Times is less than If any selected account(s) bell Cutoff time is less than certain number then change it to new time.
E.g. if any account(s) contain ˜010"- time, they will be changed with new time
- If Bell Cutoff Times is between If a bell Cutoff time is between this min and max value, then switch it with new time.
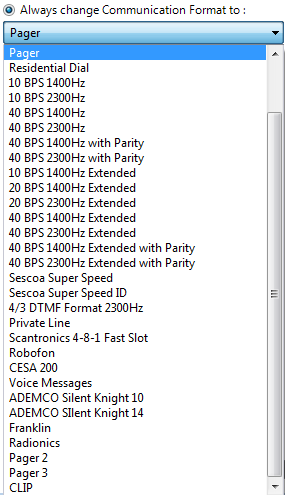
13) Communication Format
- Always change Communication Format to Select a desired communication format from drop down menu. This communication format will be implied on all the selected account(s)phone numbers supporting communication format.
- Change from ____ to ____ ”Any selected account(s) containing this type of format (choose from drop down) change it to new communication format (choose from drop down)
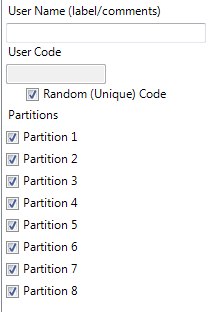
14) Add New User
- User Name This is a comment field for each user and this label will only be stored in DLS
- User Code User could manually insert a code or have a choice to randomly generate it
- Partitions Assigned a user to partition(s). If panel does not support and/or have eight partitions enabled for particular panel, the selection of disabled or unsupported partition will not take affect into the account(s)
Please note: The new user entry will be created on next available user slot within the account.
15) Delete A User
- Search By Label Insert a panel user name if it is inserted in comment field within the account(s)
- Search By User Code Insert a particular user code to be deleted from account(s)
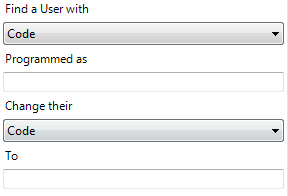
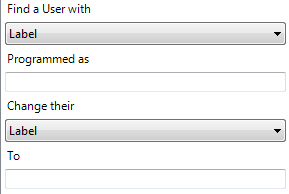
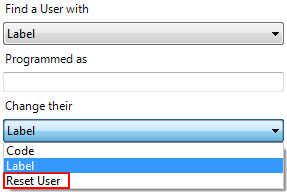
16) Replace User Information
- Find a User with Find a user either by inserting user comments/label or code and change there code or comments/label or defaul the user
- Find a User with Code:
- Find a User with Label:
- Find a User either by Label or Code and Reset:
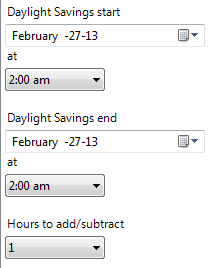
17) Change Daylight Savings
- Daylight Saving Start Choose date and time when daylight saving time will start
- Daylight Saving End Choose date and time when daylight saving time will end
- Hours to add/subtract Number of hours the clock will roll when daylight saving will begin and roll back when daylight saving will end
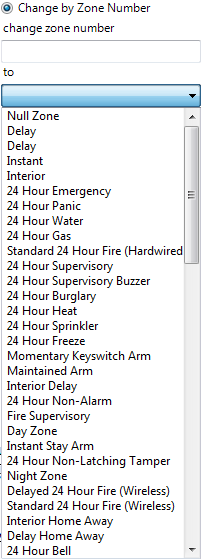
18) Change Zone Definition
- If Zone Definition is programmed as If selected account(s) zones contain this type of definition (1st drop down) change it to the new selected definition (2nd drop down)
- Change by Zone Number Assign zone definition by manually inserting the zone number
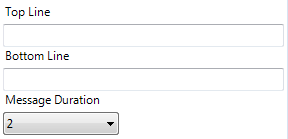
19) LCD Message
- LCD Message Any selected accounts containing LCD keypad module will be programmed with this message. If LCD Message is not supported by the keypad, it will not be applied to the selected account. You can also insert the number of minutes the message should be displayed on the keypad.
20) Apply Templates
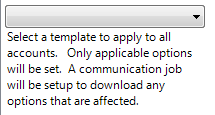
- Available Templates If any templates exist in DLS, they will be available to be applied on selected accounts in the provided drop down menu. If an option in the template does not exist in one of the selected accounts type then it will not be implied on that account. After implying the template, communication job will be created for each account to download template non-default data.
Communications
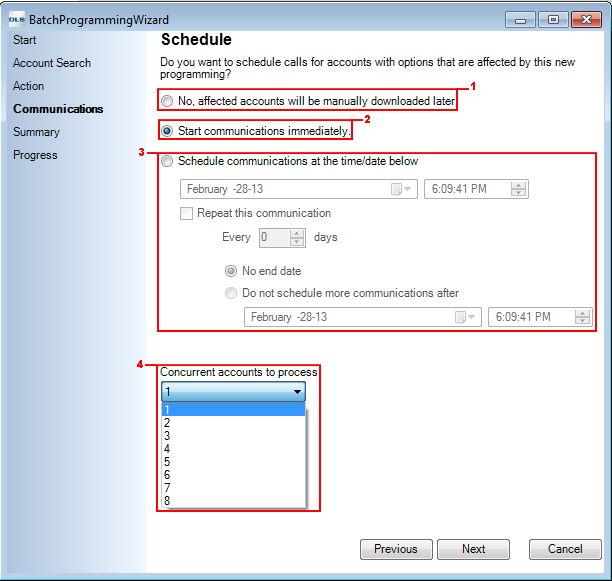
1) Apply changes to options in the selected panels and installer will manually go into each account and manually submit communication job.
2) Immediate communication
3) Setup an schedule for communication job to take place on all the selected panels
4) Number of communication jobs to be submitted concurrently.
Summary
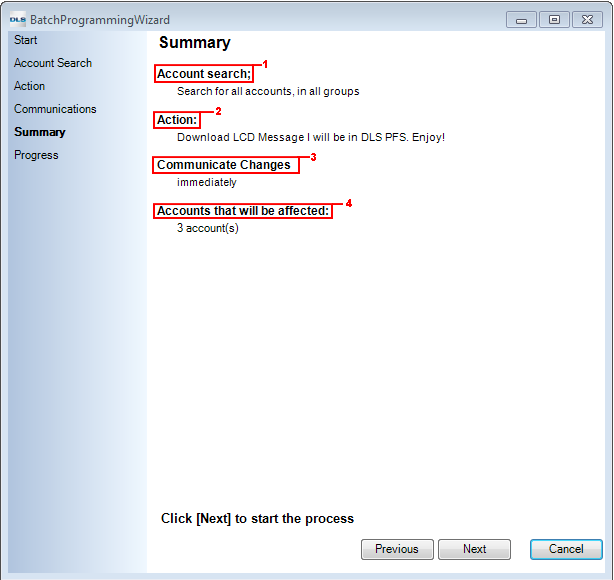
In this summary box, user will be able to see how many accounts came on search and how many of them are going to be affected by changes. User would be able to see the search criteria used to locate accounts and what type of communication job is selected for the changed accounts.
1) Account Search: This section will outline all the search criteria's used to find accounts
2) Action: What changes are included in bulk programming; what data will be changed in selected accounts
3) Communicate Changes: What type of communication method we want: none; communicate immediately or follow schedule
4) Accounts that will be affected: This section should list all the account names which will be affected by the change
Progress
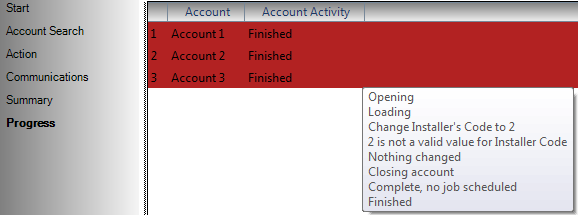
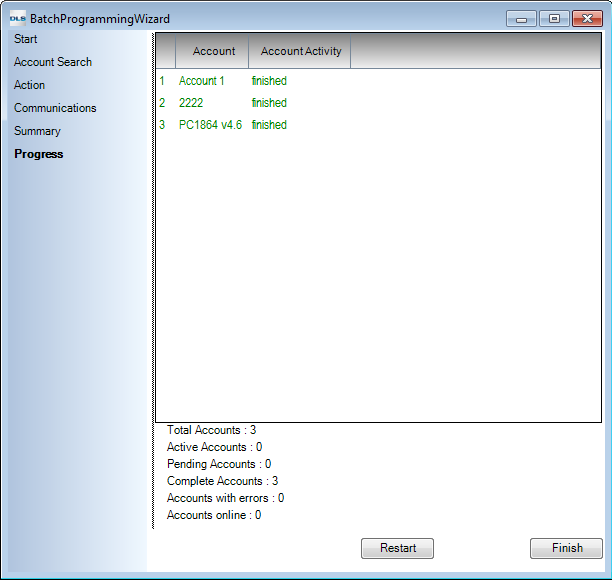
This page will actually show the status of changes taking effect on each account and updating the user with the summary in ˜Account Activity" column.
