Difference between revisions of "PowerSeries Neo/PowerSeries Pro Local Firmware Upgrade"
Jvankooten (Talk | contribs) (Created page with "1. In the DLS 5 Software, go to Tools and Select Flash Wizard File:NeoLocalFirmware-1.png 2. The Flash Wizard will open and give you a selection where you can choose C...") |
Curtis.jay (Talk | contribs) m (Curtis.jay moved page Neo Local Firmware Upgrade to PowerSeries Neo/PowerSeries Pro Local Firmware Upgrade) |
||
| (2 intermediate revisions by one user not shown) | |||
| Line 1: | Line 1: | ||
| + | [[category:Firmware]] | ||
1. In the DLS 5 Software, go to Tools and Select Flash Wizard | 1. In the DLS 5 Software, go to Tools and Select Flash Wizard | ||
| Line 14: | Line 15: | ||
4. Double-click or press [ENTER] to select the file you would like to load | 4. Double-click or press [ENTER] to select the file you would like to load | ||
| + | |||
| + | |||
| + | <font color='RED'>NOTE: When doing an upgrade of the modules attached to the panel it is recommended to complete the Bridge firmware grade first before completing the Bundle upgrade. Failure to do so can cause errors while completing the upgrade on the Bundle package.</font> | ||
| + | |||
[[File:NeoLocalFirmware-3.png]] | [[File:NeoLocalFirmware-3.png]] | ||
Latest revision as of 20:24, 1 April 2019
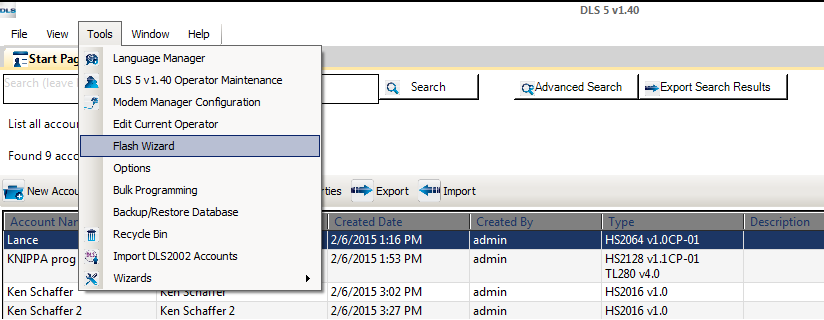
1. In the DLS 5 Software, go to Tools and Select Flash Wizard
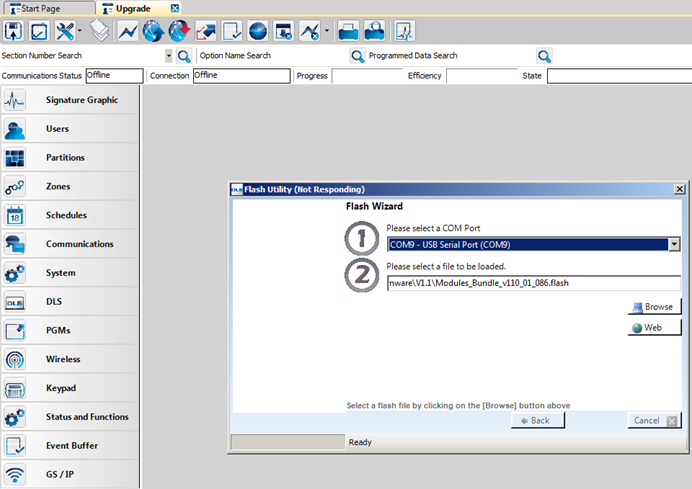
2. The Flash Wizard will open and give you a selection where you can choose COM Port, and select the file to be uploaded (Browse to a local file, or click Web to search on the DSC flash file FTP
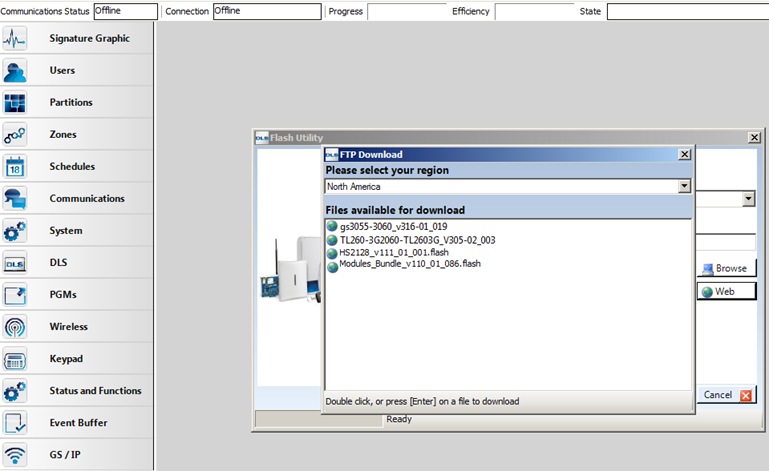
3. If you open the Web section, you will see the different firmware files available on the FTP
4. Double-click or press [ENTER] to select the file you would like to load
NOTE: When doing an upgrade of the modules attached to the panel it is recommended to complete the Bridge firmware grade first before completing the Bundle upgrade. Failure to do so can cause errors while completing the upgrade on the Bundle package.
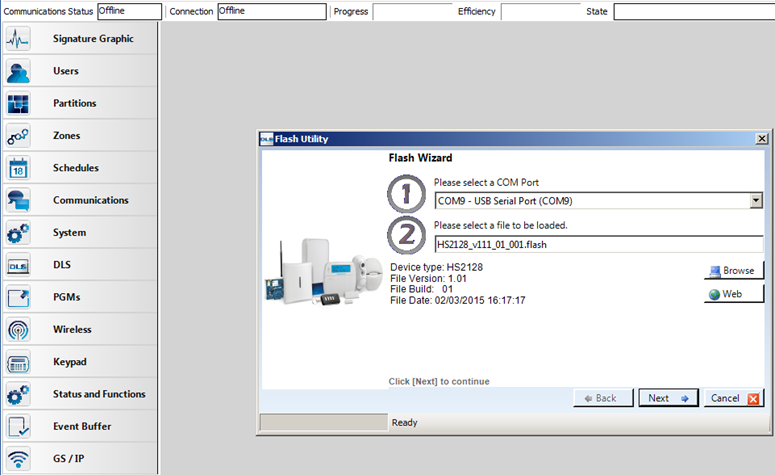
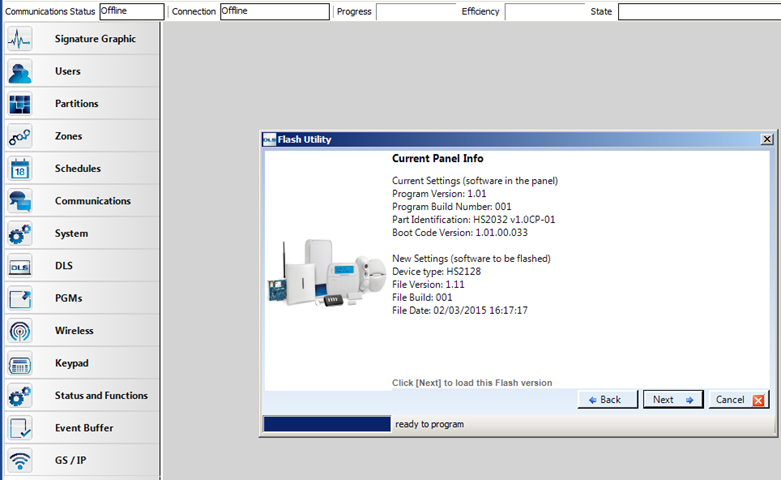
5. After continuing, the Flash Wizard will show the current panel version details
6. Click Next to continue with the upgrade if these are correct
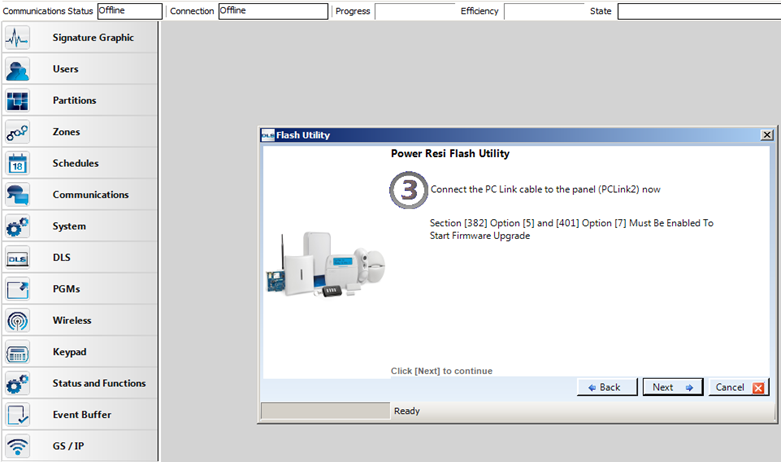
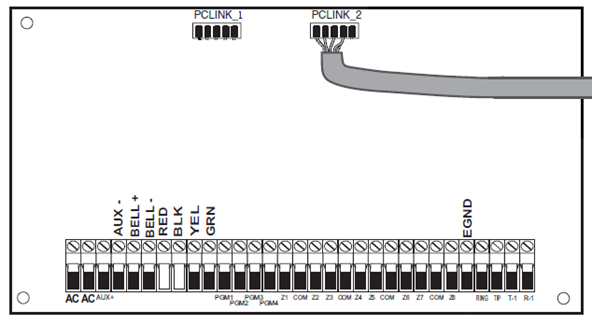
7. For the upgrade to continue, please make sure the PC-Link cable is correctly connected to the left-hand 4 pins on PC-Link 2
8. Option 5 must be enabled in section [382]
9. Option 7 must be enabled in section [401]
10. Appropriate connection for the upgrade is shown below
11. The PC-Link cable must be connected on PC-Link 2, and must be on the left 4 pins.
12. The circuit board of the PC-Link connector must face down toward the terminal strip, with the jack facing up
13. After continuing, you will see the current panel info, and the upgrade panel info
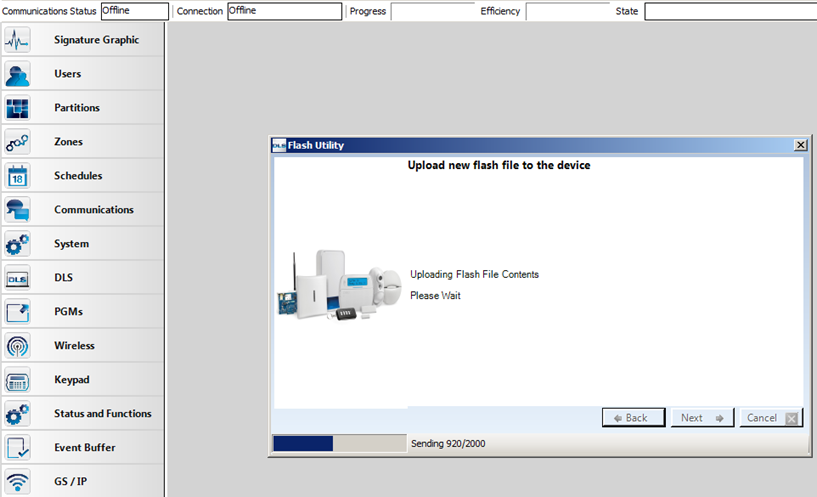
14. Click Next to start the firmware flash to the new version
15. The firmware will start being sent to the panel, with a progress bar status. The Next button will remained grayed out until the transfer is complete
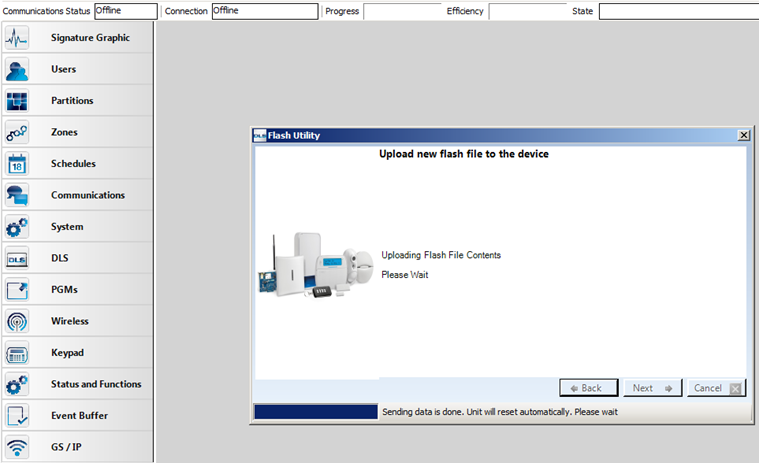
16. Once the firmware has been sent to the device, the screen will change to show that the update is being loaded to the panel
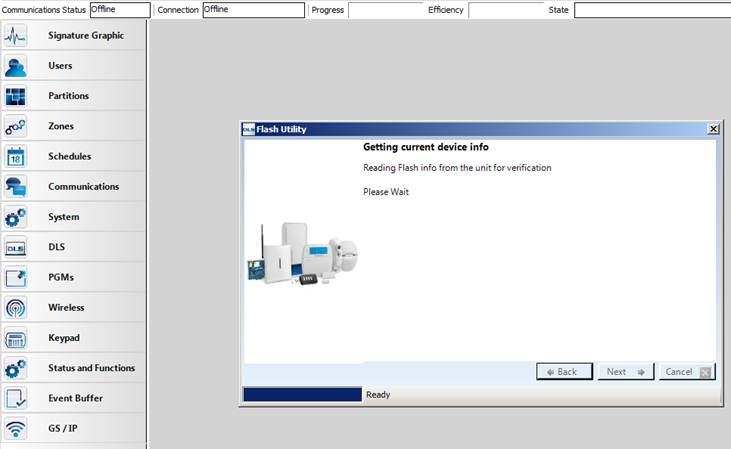
17. After the firmware is sent, DLS will verify the flash file of the unit to make sure that it is showing the correct information
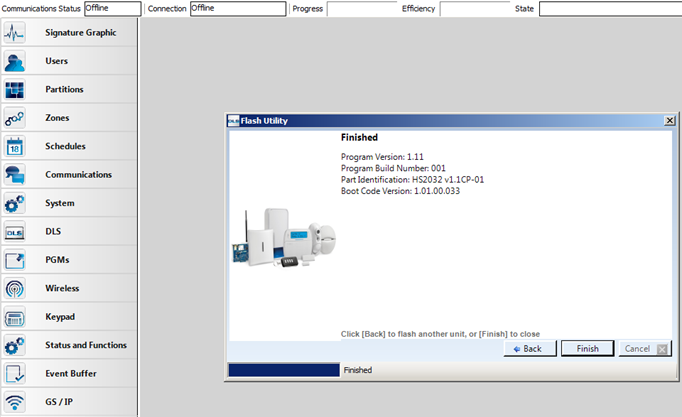
18. Once DLS verifies the firmware, it will show you a final screen with the new version information
19. From this point, you can click Finish if you are done with the upgrade, or Back to flash another unit/firmware. If you have loaded the panel firmware, you will now need to load the firmware bundle containing files for the HS2#### keypads and HSM2HOST
Please Note: If your panel does not normally have a 3G2080/TL2803GR/TL280 on it, please remember to disable [382] opt 5 and [401] opt 7 to ensure you do not have a trouble on the panel after leaving the site
