Backup/Restoral
Backup/Restore Tutorial
Backup
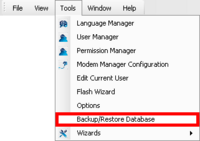
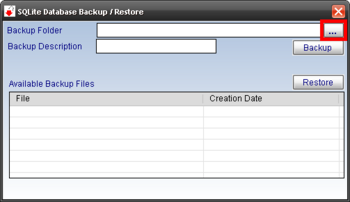
1. In order to backup your accounts, go to the following location on DLS 5: Tools -> Backup/Restore Database. Once you click on “Backup/Restore Database a new window will appear. Under the Backup Folder heading on the right side of the window there is an icon that will allow you to choose where you would like your backup files to be located.
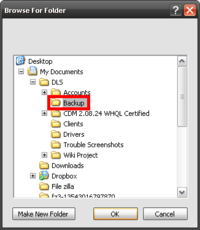
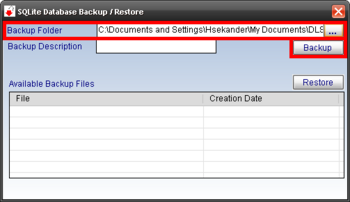
2. Once you click on the icon it will ask you to choose a directory i.e. My Documents/DLS/Backup. Select “Ok†to confirm the location of the backup file pathway. The Backup Folder heading should now be populated with the backup file pathway. Click on “Backup†to begin the process.
3. A new window will appear indicating whether or not you would like to go through the backup process. Select “Yes†to confirm the backup process.
4. The process will now begin backing up your files, keep in mind the time will vary depending on how big your database is.
Once the process is complete the Backup window will indicate a “dlspronet.sqlitebk†has been created with the time and date of when it was created.
Restore
1. In order to restore your accounts, go to the following location on DLS 5: Tools -> Backup/Restore Database. Once you click on “Backup/Restore Database a new window will appear. Under the Backup Folder heading on the right side of the window there is an icon that will allow you to choose where you would like your restore files are located.
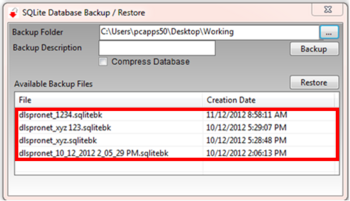
2. Once you click on the icon it will ask you to choose a directory i.e. My Documents/DLS/Backup. Select “Ok†to confirm the location of the restore file pathway. The Backup Folder heading should now be populated with the restore file pathway, as well as backup file. Select the backup file and click on “Restore†to begin the process.
3. A new window will appear indicating whether or not you would like to go through the restore process. Select “Yes†to confirm the restore process.
4. It will then indicate DLS 5 will be closed while going through the restore process and be reopened once its done.
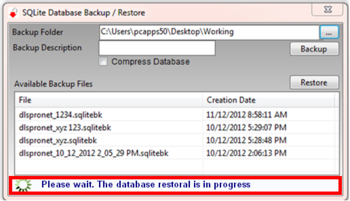
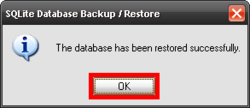
5. The process will now begin restoring your files, keep in mind the time will vary depending on how big your database is. Once the process is complete it will indicate the database has been restored successfully, press “Ok†to confirm. This will now bring up your DLS 5 login window, once you login your accounts should be restored on your start page.
Database Restore Error Message
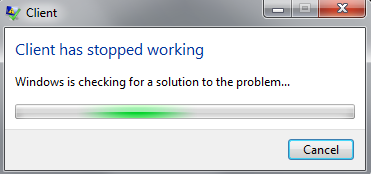
If the database is corrupted then it will not be successfully restored. During the corrupted database restore process, user will be prompted the following message and database will not be restored:
